Last Update: 2024 - 05 - 21
How to create HTML-emails with Microsoft Access and Outlook automation
Published: June 15th 2015
This article describes how to create an html email from your Microsoft Access application, how to add CSS formatting and include inline images in the email.
You need to have Microsoft Outlook 2007 (or newer) installed for the sample to work. Outlook Express will not work.
Creating the email message
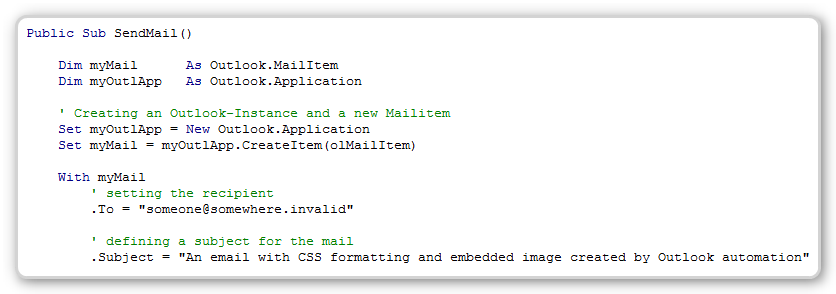
The basic creation of the email is similar to the code in my article on how to create emails by Outlook automation. You create an Outlook application object, then create a MailItem object, set the sender and recipient addresses, and a subject. This is essentially the same approach. Here is the VBA code for this:
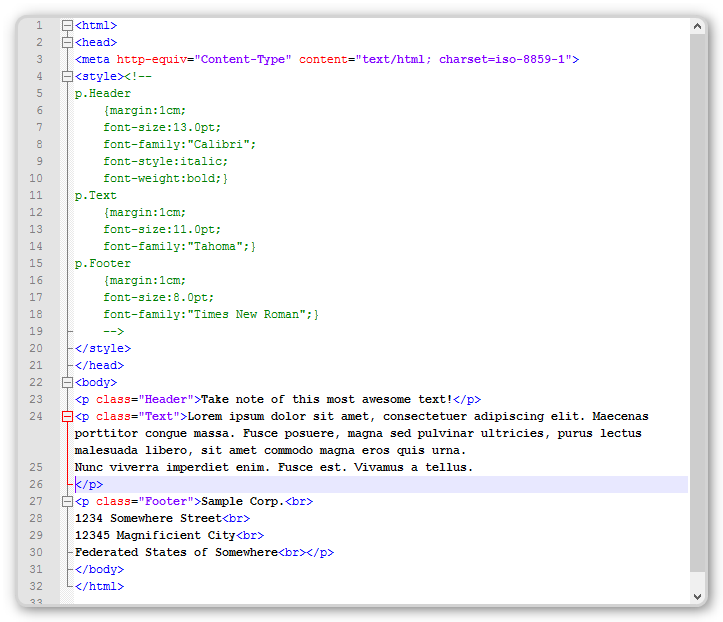
Instead of the normal plain text email message, I showed in the original sample, we will use an HTML-formatted text as body. You can use any HTML-editor to create the html code of the body. If you are familiar with HTML you can also use any plain text editor, even Notepad will do. A simple HTML text for our email could look like this:

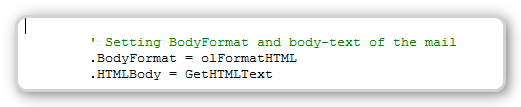
You could store the HTML text for the email in a field in a table or in the text file. The storage and retrieval of the text is not subject of this article therefore I will abstract this away and just assume there is a function GetHTMLText that returns the HTML as a string. After we have created the body of the email we have to indicate that we want to send a HTML-email by setting the BodyFormat-Property accordingly and by setting the body of the Mailitem. Other than for plain text emails we need to use the HTMLBody-Property.
We could now send the email, as in my simple sample by using Mailitem.Send.
Formatting the email text
But I would like to go a bit deeper with this sample and add some additional formatting to the email. We could simply use the formatting properties of basic HTML like <font face=”Arial”><b>foo</b></font> to create formatting. But this is somewhat old fashioned and I would rather discourage it because it creates a tight coupling between individual email text elements and their formatting.
As in general web design, the better way to do this is to use Cascading Style Sheets (CSS). You can use CSS in email as well. But as the support for CSS in mail clients is not as extensive as in most of the common web browsers, you should check if the elements you are using are supported by the most common mail clients. Here is a good matrix of supported CSS elements in various email clients.
So instead of using the tightly bound formatting in the individual HTML tags, we add the CSS to the header of our HTML body. I use the CSS class attributes Header, Text and Footer in the HTML tags to apply the formatting to each of the blocks. I recommend you store the CSS separately from your emails text to keep text and layout to itself and can more easily change each without digging through the other. For simplicity I will assume this sample that our function GetHTMLText returns the complete HTML including the CSS of the header. The complete source of our email could look like this now.
Now we have prettier looking HTML email and again, we could send it right now. - But wait there is more.
Including images in your HTML text
Sometimes you want an even prettier email and add an image as well. There are two ways to do this. The first one is widely used and rather obvious. You can put an image tag, like this <img src='http://someserver.invalid/DummyBarcode.jpg'> inside your html, which points to an image on a publicly available website.
This reduces the size of each email that is send and received and it is can be used to track the reading of the email by the recipients as well. While it is a huge advantage to be able to track the open/reading-rate of your email campaign, there are disadvantages with this approach as well.
Some people, me included, are sick of their email reading being tracked and hence configured their email client to not display external images automatically when reading an html email. These people will not see your image unless they explicitly download it. The other obvious disadvantage is, that the recipient will have to be online not only to receive the email but to read it as well. This is undesirable in situations, where you want the recipient to be able to view the image any time he opens the email whether he is online or not, especially on mobile devices. A good example for this is the QR-Code in a boarding pass email for an airplane flight.
So I here want to focus on the other option to include an image in your HTML email text. This is embedding the image as an attachment to the email. Adding an attachment is fairly easy. I included the single line of code for that in my original sample. But it is not that easy to use such an attachment as an image within the HTML body of the email.
To achieve this you need to add a MAPI property to the attachment that is not directly supported by the Outlook object model. It is the PR_ATTACH_CONTENT_ID. This ID can be used as the image source in the HTML-code of the body. To set this MAPI property we need the SetProperty Method of the PropertyAccessor-Objectof the Attachment Object. The schema used as the first parameter is http://schemas.microsoft.com/mapi/ followed by the const “proptag” if you use a predefined MAPI property and finally the actual value of PR_ATTACH_CONTENT_ID, which is 0x3712001F.

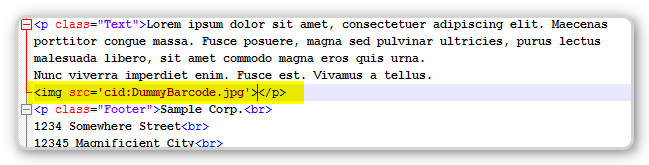
You can use any string as an CID for the attachment, but it has to be unique within your email. I usually use the file name for it. It can then be referenced in an img-Tag prefixed with the string cid: in the HTML text like this.
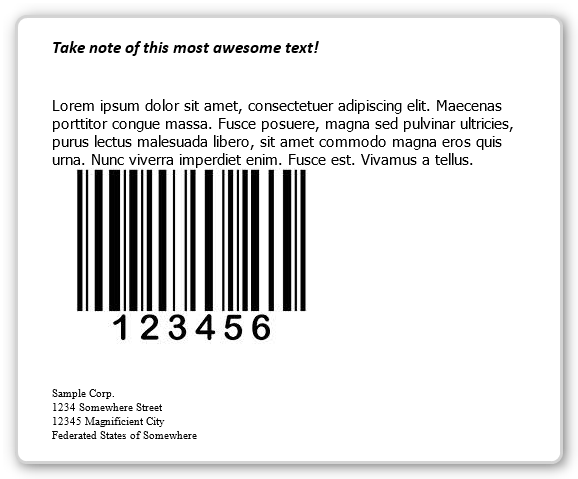
Now we can finally send the email formatted nicely with CSS and an embedded image that will be available right in the recipient’s inbox whenever he reads our email.
This is how this email looks in my inbox:
Here is the full VBA source code to send the email from Access.
I hope you enjoyed reading this article and it helps you to create more advanced emails from within your Access application.


I will never share your email with anyone. You can unsubscribe any time.
This email list is hosted at Mailchimp in the United States. See our privacy policy for further details.

© 1999 - 2024 by Philipp Stiefel - Privacy Policiy